How to Edit and Use Pre-Built Templates
Find the perfect document to suit your needs, easily edit to your requirements and send for signing, all within our easy-to-use platform.
Step by Step Guide – Use Document Templates
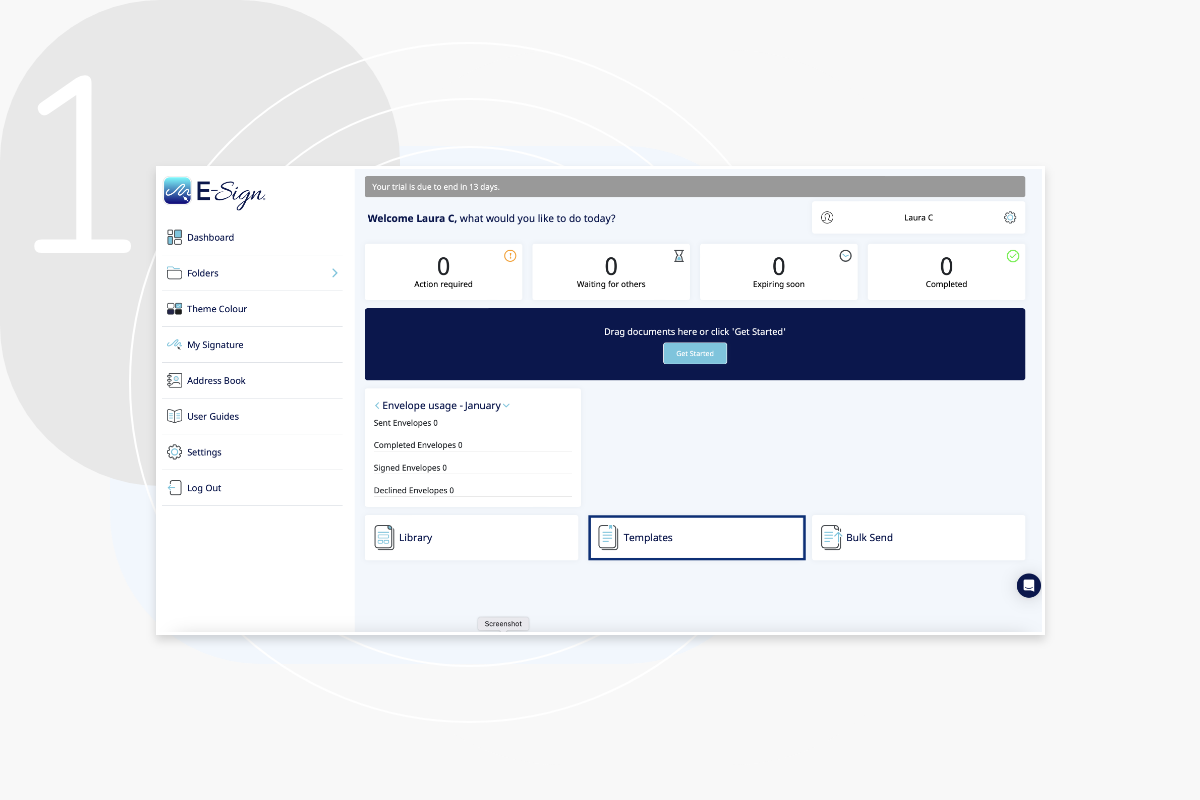
Step 1
To get started, click ‘Templates’ in the your eSign dashboard.
Step 2
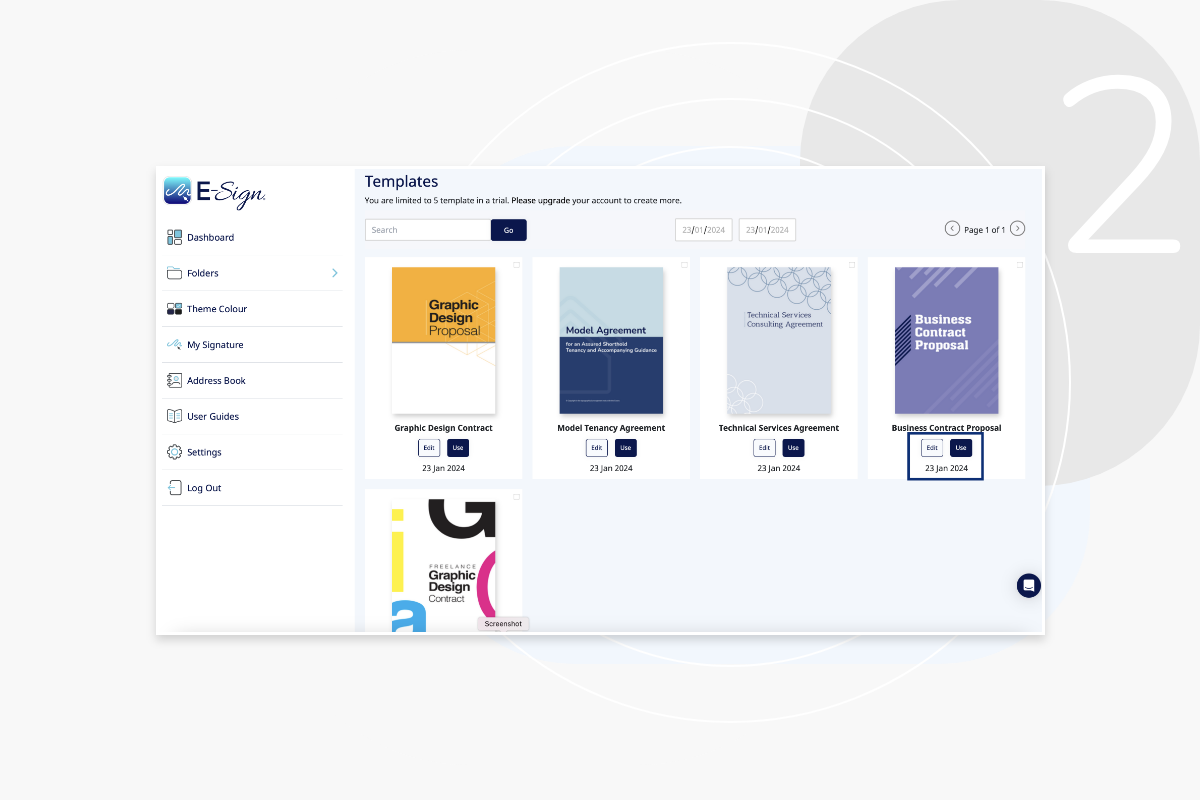
Here you will be shown the documents you have access too. Choose the template you wish to edit and send and click ‘Use’.
Step 3
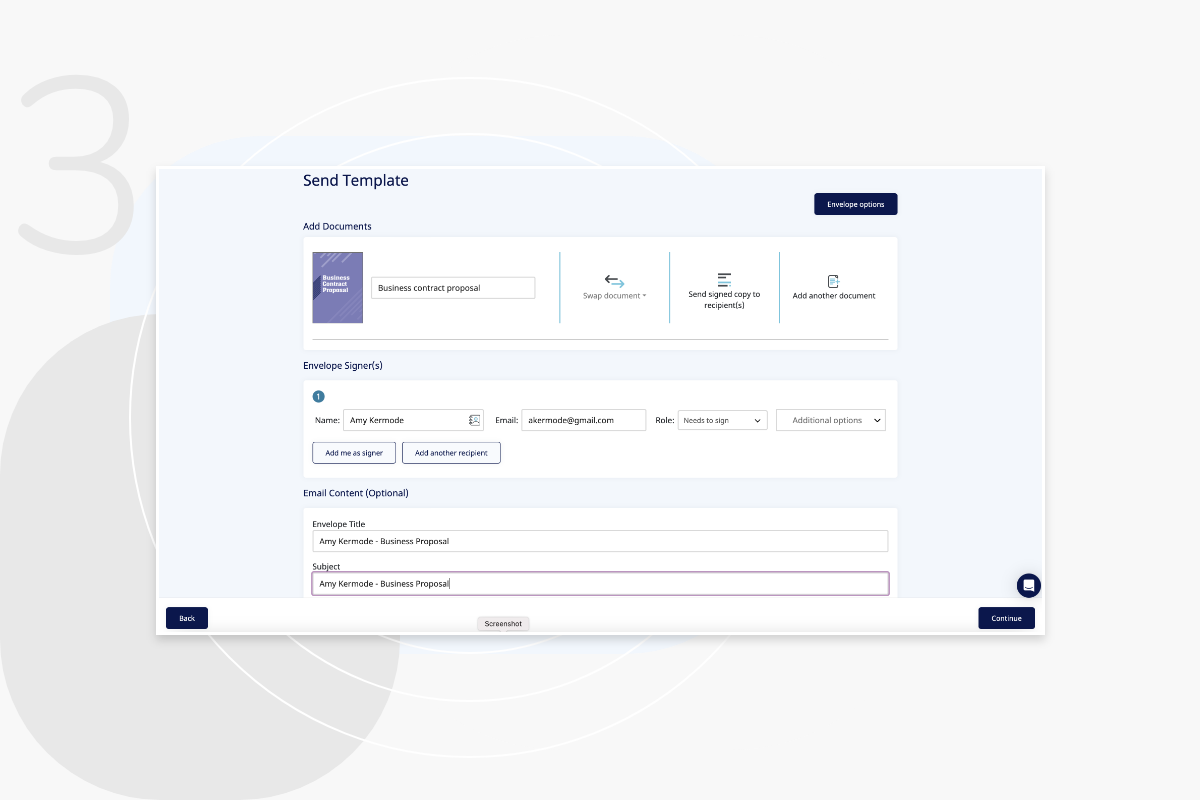
Here you can name the document, add recipient details, and enter the envelope content such as title, subject and description. The envelope content will be shown to the recipient in the email they receive along with the document link. You also have the option to add up to 10 additional documents for signature, to the envelope by clicking ‘Add another document’.
Step 4
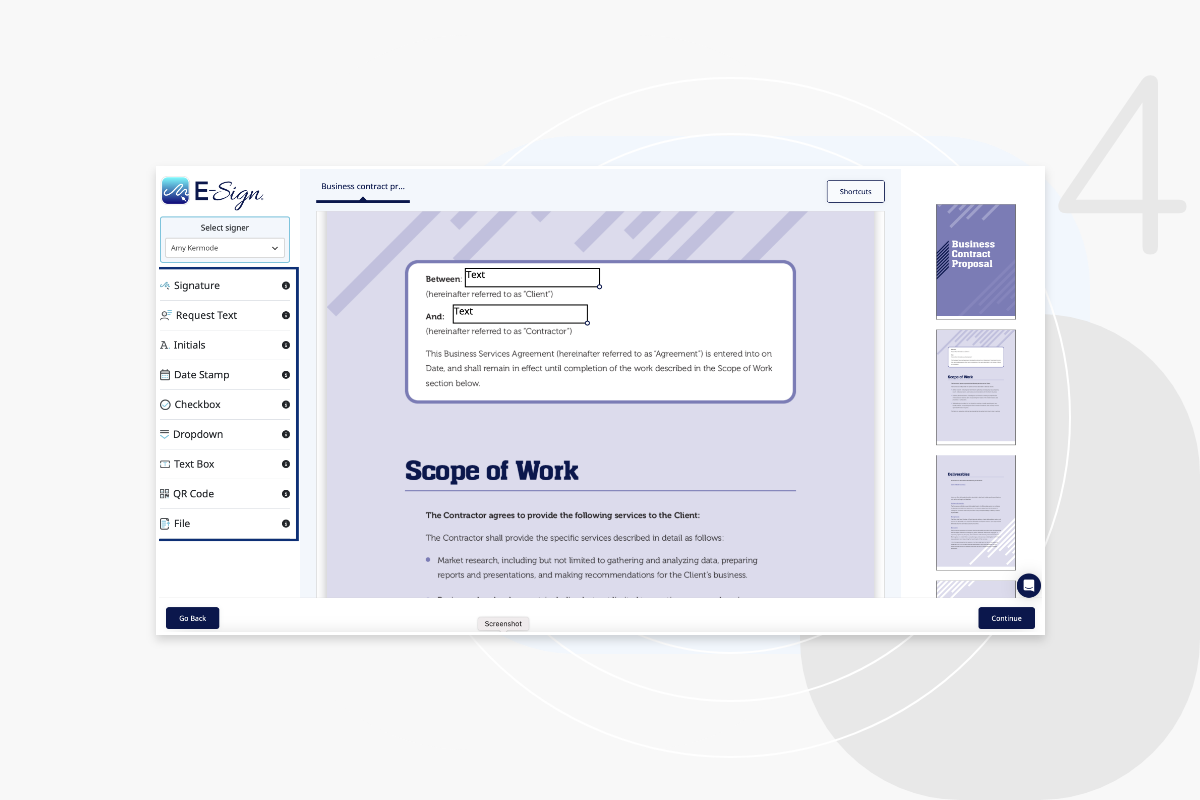
Now you will be shown the document ready to edit. The document has built-in fields such as text boxes or signature, however these can be replaced with new fields as required. Drag and drop request text, text boxes, signature, initials, checkboxes and more to ensure that your document is created to your requirements.
Step 5
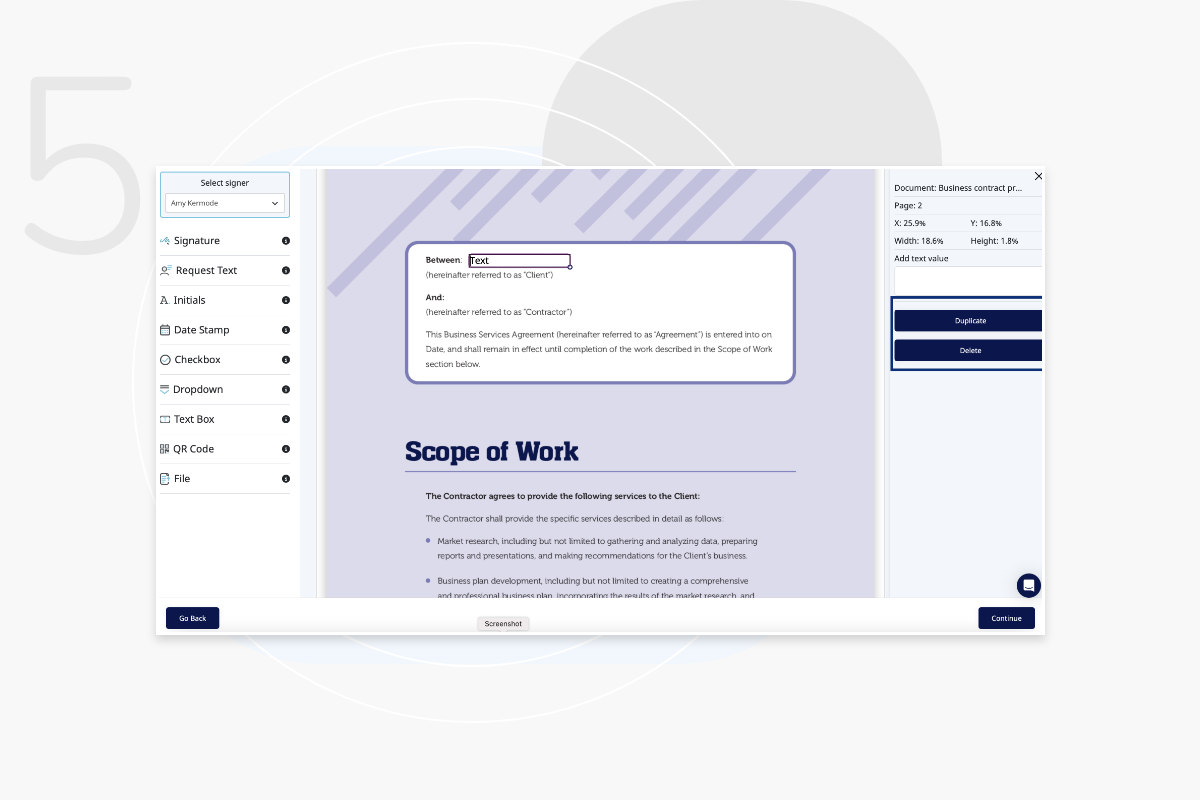
To delete or duplicate a label on the document, simply click the label and choose from the options on the right-hand side of the dashboard.
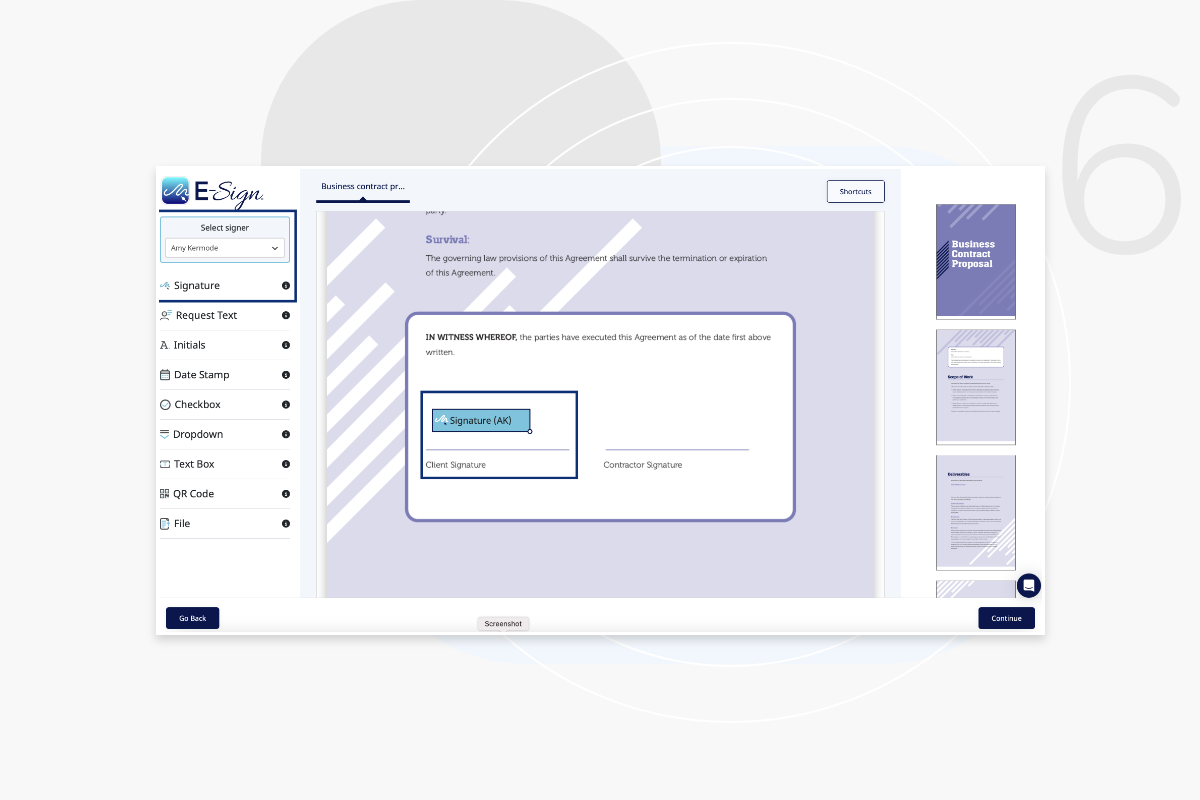
Step 6
You can alternate between each signature and place in a specific area on the document by clicking and highlighting. Once the signer’s name is highlighted, drag and drop your signature field into the required place. Each signer will have their own highlighted colour so you can distinguish between them easily.
Step 7
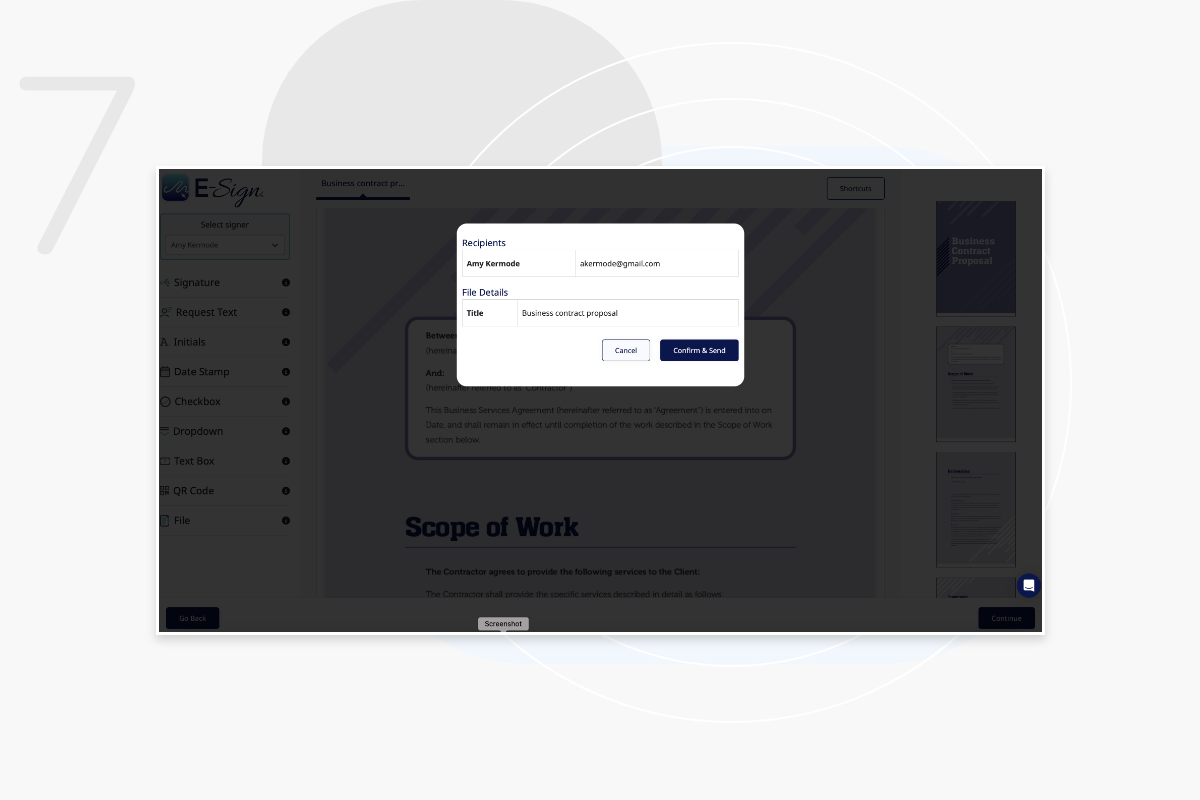
Once you are happy with the document, click ‘Continue’, ensure the email is correct and then click ‘Confirm & Send’.
Step 8
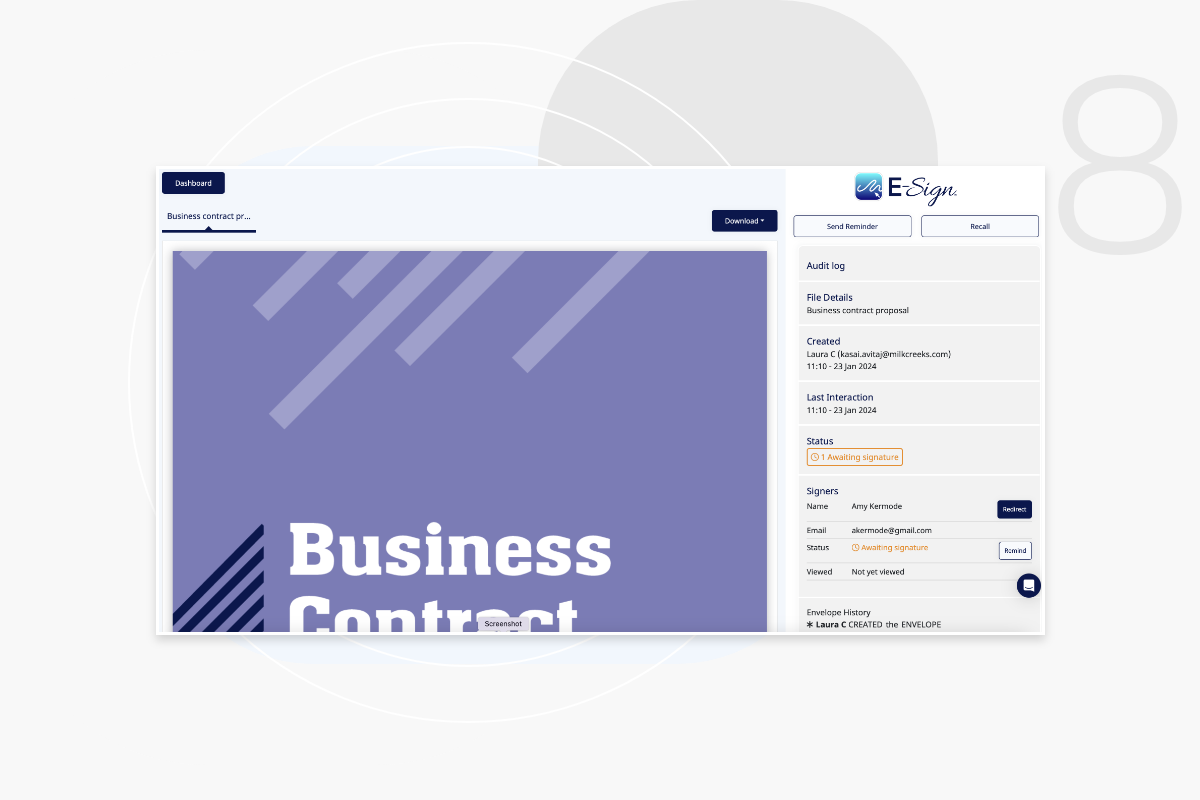
Once sent, you will have the option to send a reminder or recall the document. You can also redirect the document to a different recipient and remind the recipient if the document is still waiting to be signed. When the document has been signed you will receive an email to view the completed document, where you will have the option to download a copy.
Frequently Asked Questions
How do I access my saved templates?
This can be done by accessing the ‘templates’ tab within your E-Sign dashboard.
Can a bank of templates be created for all users of the account to access?
Yes. All users of the account can be given access to view all documents and templates within the E-Sign dashboard. This is effective for document collaboration and document management.
Can I save my templates in document packs?
Yes. Whenever you create a template, you are given the option to save it. Also, when you open a saved template, you can adjust it and save again.


